
Overview
If your email service has recently been moved to our new hosting portal, you may need to update your Outlook settings to continue receiving emails.
Don't worry, this is a simple change and you won't need to remove or recreate your email account.
These instructions are for an existing POP email account in classic Outlook for Windows.
Step-by-Step Instructions
1 Open Outlook Account Settings
- Open classic Outlook.
- Click File in the top-left corner.
- Under Account Information, make sure the email account you want to update is selected in the drop-down menu.
- Click Account Settings, then select Server Settings.
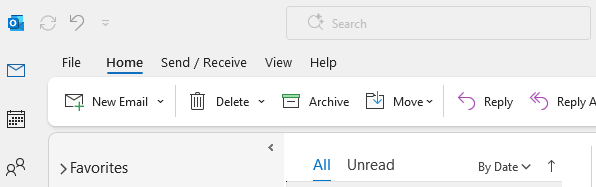
Open the File menu in the top-left corner of Outlook.
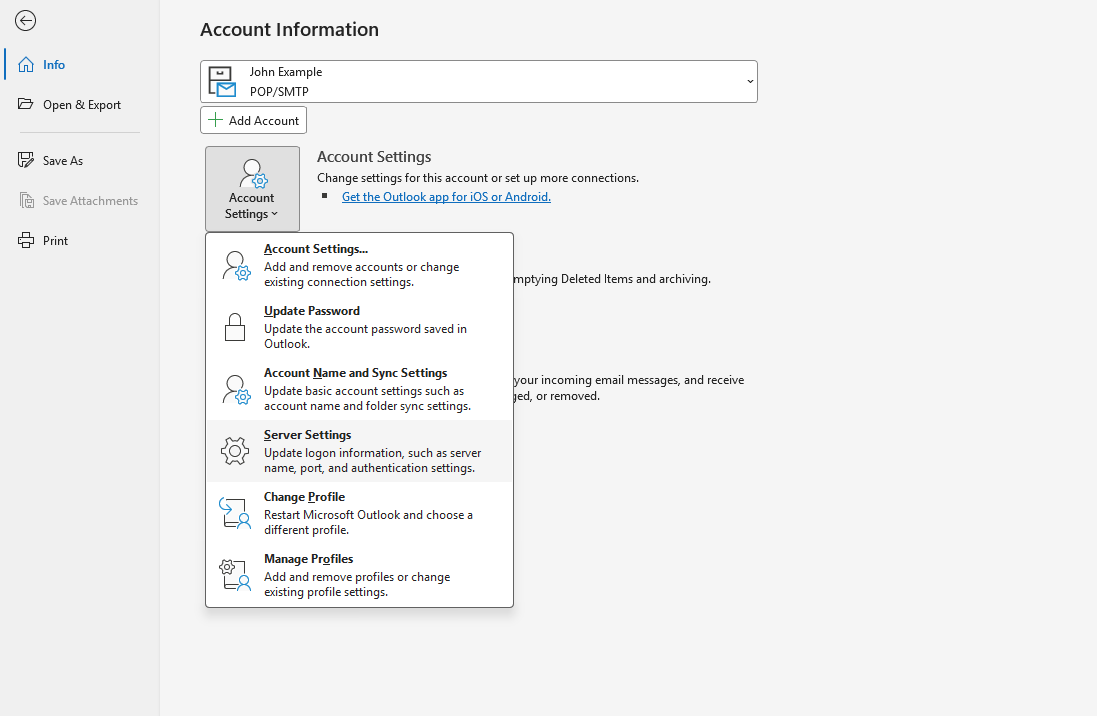
Select the correct email account, then open Account Settings > Server Settings.
2 Update Your Incoming Mail Settings
- Expand the Incoming mail section if it is not already open.
- Find the Server field.
- Change it to mail.yourdomain.com, replacing yourdomain.com with your own domain name.
- Ensure the User name field contains your full email address (e.g. john@example.co.uk).
- Set the Port to 995.
- Ensure the incoming encrypted connection option, labelled SSL/TLS, is enabled.
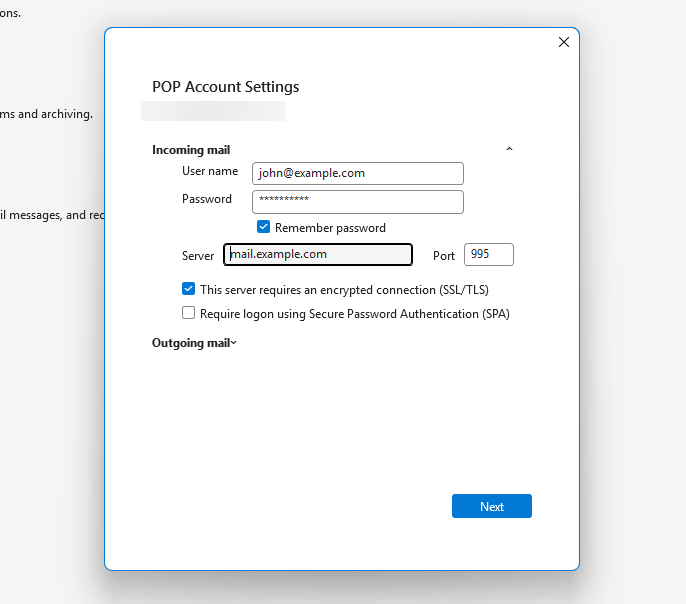
Incoming server name, username, port 995 and SSL/TLS settings.
3 Update Your Outgoing Mail Settings
- Expand the Outgoing mail section.
- Change the Server to mail.yourdomain.com, using your own domain name.
- Set the Port to 587.
- Set the Encryption method to STARTTLS.
- Ensure My outgoing (SMTP) server requires authentication is ticked.
- Select Use same settings as my incoming mail server.
- Click Next to save your changes.
- Once Outlook confirms the settings have been updated, click Done.
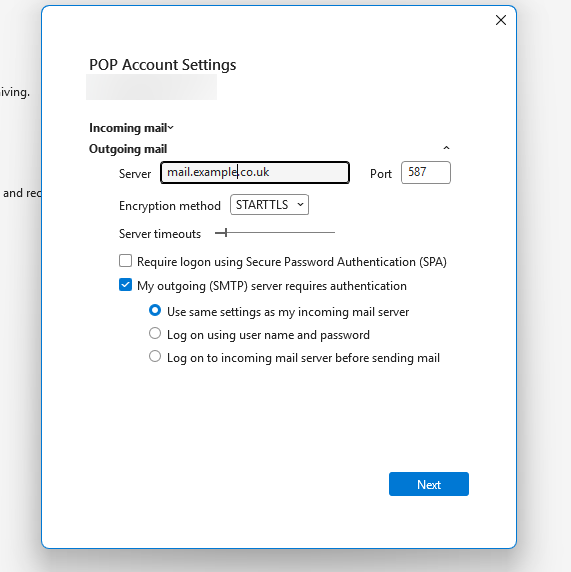
Outgoing server name, port 587, STARTTLS and authentication settings.
4 Check Your Emails
- Return to your Outlook inbox.
- Open the Send / Receive tab and click Send/Receive All Folders.
- If prompted, enter your email account password.
- Send yourself a test email to confirm everything is working.
Important: Do not delete your existing email account from Outlook.
POP email accounts may store downloaded messages on your computer. Removing the account or its data file could put previously downloaded emails at risk.
You only need to update the existing server settings.
Email Settings Reference
Use the following settings for your email account:
| Setting | Value |
|---|---|
| Incoming Server (POP3) | mail.yourdomain.com |
| Incoming Port | 995 |
| Incoming Security | SSL/TLS |
| Outgoing Server (SMTP) | mail.yourdomain.com |
| Outgoing Port | 587 |
| Outgoing Security | STARTTLS |
| Outgoing Authentication | Use same settings as incoming mail server |
| Username | Your full email address |
Remember to replace yourdomain.com with your actual domain name.
Still Having Problems?
If your emails still aren't arriving:
- Double-check that your server names and port numbers match the table above.
- Make sure you're connected to the internet.
- Close Outlook, reopen it and try checking for messages again.
Need a Hand?
If you're still having trouble receiving emails after updating your settings, please open a support ticket through your customer portal.
Our support team will be happy to help you get your emails working again.


